Host Jekyll Website To Google Firebase For Free
Hey friends, do you know about Google Firebase? It’s another way to deploy or host your Jekyll website for free. Well, I am not here to teach you what’s the difference between old Appspot and Firebase, but I can say that Google Firebase is the best free alternative of Github pages.
Most of people used Github pages as a hosting for their Jekyll based website, because it’s free and easy to use and here is another free thing that you can use for your Jekyll website.
Why I switched Away from Github pages instantly (After Reading Firebase News).
1. I love Google: I really like All Google products. I don’t want to say anything, because it’s hard to describe: p
2. Github pages are slower: May be you have used old github pages, but if you create a new repository than you will see most of our content load very slow compared to when github pages is introduced.
3. Lake of server configuration support: Whenever I need to redirect any user, I need to use Meta refresh tags, which is a client side solution for redirection, but server side 301 solutions is far better than that, because it’s better for users as well as for the Google spider/bot. Also, you have no access to rewrite rule for htaccess file, while in Google Firebase, you have access to those things.
4. Its Google CDN: We all know if anyone can beat Amazon cloud, so that is Big G. By using Firebase your site will serve through their global CDN, which means your site will serve content too fast from a nearby location.
5. Free SSL: I have used cloudflare SSL, it’s free, slow, and not secure end to end. While Google Firebase gives you a free SSL certificate which encrypt data from the user’s browser to the origin server, so it’s more secure than cloudflare.
What you should note before the switch from Github Pages to Google Firebase.
1. Checkout Their price model: We all know static content consume only few resources, but still you should check their pricing model, so check out whether free plan is good enough for you or not, but if you think you need more storage and bandwidth then check out their blaze plan, it is too cheap, just play with their calculator (Select Hosting), and you will understand, how cheap they are.
2. You need _Site Folder: Well, if you have used only Github pages, then you should note that, Github pages build our site for us, so we did not need to deploy jekyll _site folder, but if you used any other hosting solution then you need to use that folder only. So here we also need to deploy our _site folder only.
3. You can’t use the second domain name Update: Firebase now support multiple subdomain as well. Now we need only one future, and that is version control, so we can deploy only changed files.
OK, now we are ready to use Google Firebase with Jekyll, so just follow below steps numbers.
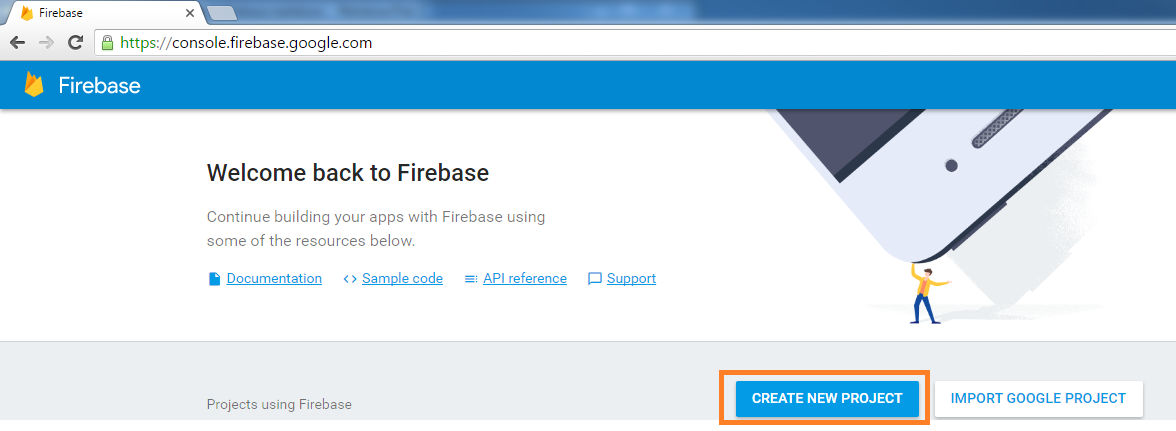
Step 1 : Create a free account on Google Firebase.
Create a free account on Firebase Console, and click on create new project.
Step 2 : Install node js
Firebase CLI work with node js packages, so you have to install node js in your system, so Just visit node js website and get your specific setup file and install it in your system. And don’t forgot to add environment path variable in your system, so you can easily use your favorite command line shell from everywhere.
Step 3: Install Firebase
Now we have assumed that you have node js. Now open your favorite shell, and run this command.
npm install -g firebase-tools
Now this will install all necessary firebase packages.
If you see any error like an upgrade to v 4.0 in windows machine then just ignore it. After a few minutes all the packages will be installed in your machine.
Now run this command to login
firebase login
Now, your browser will automatically open and it asks to give some permission to Google, so just give it to them.
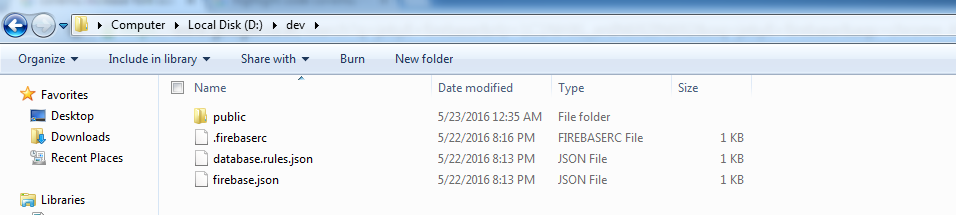
Step 4: Setup Firebase project
Just like we use jekyll new . to create a new jekyll website, here we do the same thing for Firebase. So choose your favorite location, mine is d:/dev/ for this example.
Now go to that directory with cd command, like cd d:/ and cd dev
Now run, this command
firebas init
So just like Jekyll generate many of folder (layout, post, include, config etc) for us, firebase will also generate four things, like this.
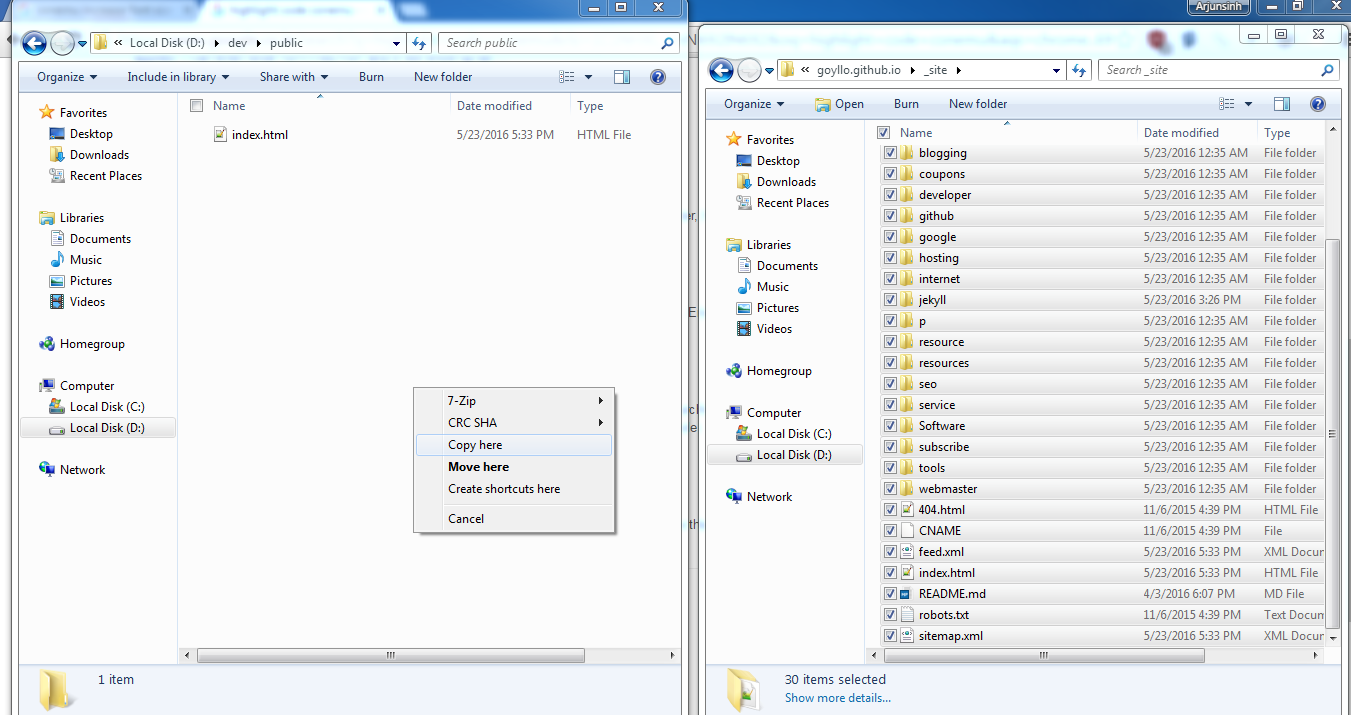
Step 5: Generate your Jekyll site
Now come back to your Jekyll website, and delete your _Site folder. I said to delete it, because it may contain some old junk files.
Now run jekyll serve --watch command.
Now you will see _Site folder again so just go to that folder and copy everything.
Now copy all the data to firebase public folder i.e d:/dev/public. And don’t forgot to replace/delete default index file.
Step 6: Check your local site with firebase
We all know, we can easily see our jekyll website locally though 127.0.0.1:4000, similarly you can check that public folder(d:/dev/public) with firebase command.
So just close anything in your terminal(Press CTRL+C), use cd command to go d:/dev folder, and then run this command.
Firebase serve
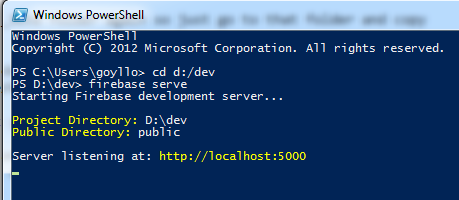
Now you can see, your site locally though 127.0.0.1:5000 or localhost:5000 from your browser.
It is really good to see how your site will be live before you deploy it. And don’t forgot to use _draft folder, so jekyll don’t generate it those pages in your _site folder.
Step 7: Let’s deploy it.
Deploying your files to firebase is quite easy, just hit this command.
firebase deploy
When they successfully deploy it, they will say visit this URL to see your site live. So just visit it, you will see your site is live with their sub domain like https://projectxyz.firebaseapp.com
Step 8: Let’s connect our custom domain name to Firebase.
If you’re using cloudflare, then you need to first disconnect your site from cloudflare i.e. change your name server to default, and copy paste all the record again to your domain panel. I have not changed and try out custom domain with cloudflare and I have seen 25 redirection, and It is because Cloudflare page rules and some of my mistakes: D Anyway cloudflare was not necessary for me since Firebase also gives me free SSL.
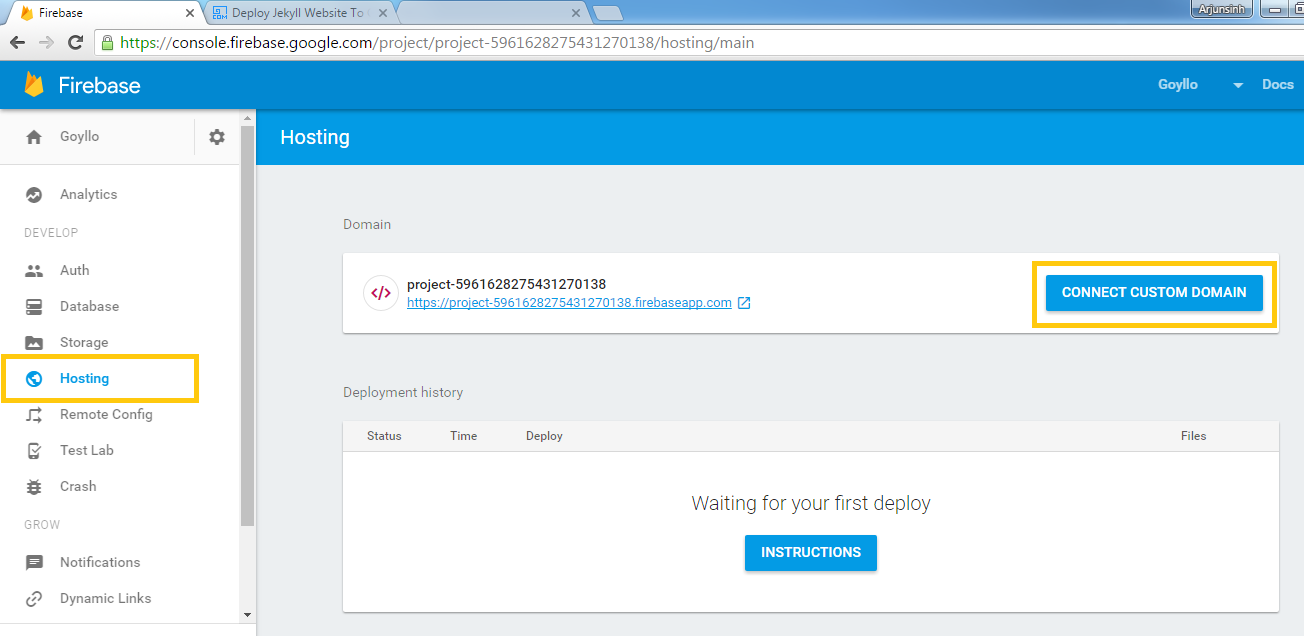
First, go to your console, click on hosting from right side, and then click on connect custom domain.
So just put your custom domain name, they already write better description about what to put, so just read it, they have written better than me :D
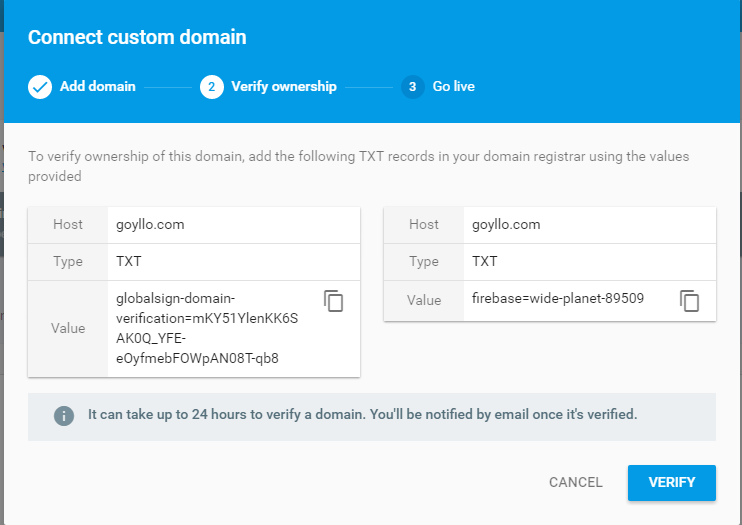
Now you need to add those TXT records in your domain panel. So just go your domain DNS manager and add those TXT records, you can even write @ in host value instead of your domain name.
Now similarly add CNAME records in your domain control panel.
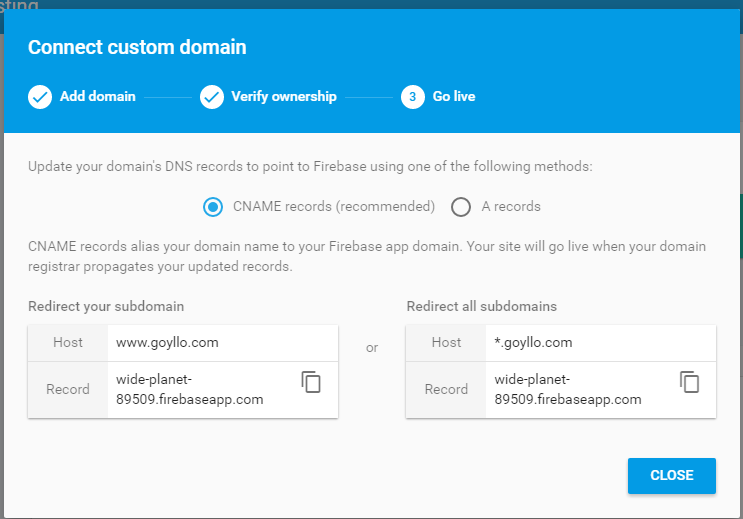
Now wait for few minutes, your site will be live soon with free SSL, for me it take only 15 minutes, but it can take up to 24 Hour. So just wait.